


液态玻璃按钮的背景着色
在SwiftUI上,通过创建自定义按钮样式,你可以实现一个带着色玻璃效果的按钮。
struct SomeButtonPreview: View {
    var body: some View {
        ZStack {
            LinearGradient(
                colors: [
                    .red, .orange, .yellow,
                    .green, .blue, .indigo, .purple
                ],
                startPoint: .topLeading,
                endPoint: .bottomTrailing
            )
            .ignoresSafeArea()


            Button("Tap Me") {

            }
            .buttonStyle(SomeBtnStyle())
        }
    }
}

struct SomeBtnStyle: ButtonStyle {

    @ViewBuilder
    func makeBody(configuration: Configuration) -> some View {
        configuration.label
            .padding()
            .glassEffect(.regular.interactive().tint(.green))
    }
}
结果:
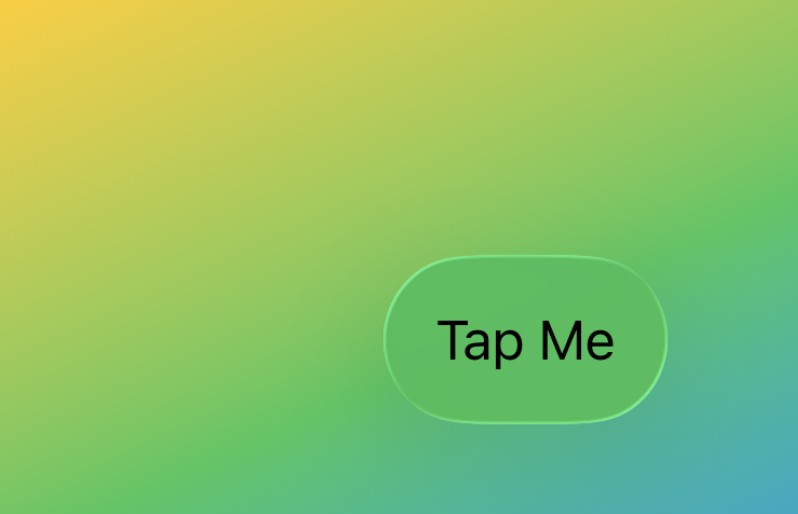
然而,当我在UIKit的按钮上做同样的事情时,结果并不像那个设计:
private let centerButton: UIButton = {
    let button = UIButton()
    button.setTitle("Tap Me", for: .normal)
    button.translatesAutoresizingMaskIntoConstraints = false

    var configuration = UIButton.Configuration.glass()
    configuration.background.backgroundColor = .green
    button.configuration = configuration

    return button
}()
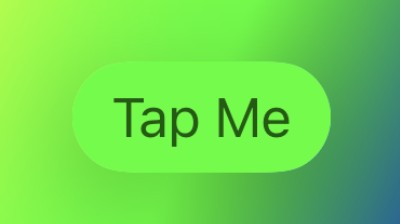
它更像是一个带玻璃动画的纯色效果。这并不是我所期望的结果。那么,在UIKit中如何给玻璃效果指定颜色,尤其是按钮?我读过官方文档,却找不到任何线索。
解决方案
你可以在UIKit中通过 UIVisualEffectView 搭配 UIGlassEffect 实现类似SwiftUI的 .glassEffect(.regular.interactive().tint(.green))。
UIGlassEffect 支持交互式玻璃材质和着色颜色,而 UIVisualEffectView 提供实际的渲染。在这个示例中,按钮嵌入在效果视图内部,容器的圆角半径会动态更新以创建胶囊形状。
结果(UIKit与交互式玻璃效果):
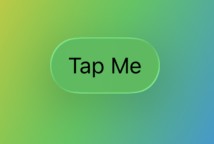
代码示例:
import UIKit
import SnapKit

class ViewController: UIViewController {

    private let buttonContainerView: UIVisualEffectView = {
        let effect = UIGlassEffect(style: .regular)
        effect.isInteractive = true
        effect.tintColor = .systemGreen

        let view = UIVisualEffectView(effect: effect)

        return view
    }()

    private let button: UIButton = {
        let button = UIButton(type: .system)
        button.setTitle("Tap Me", for: .normal)
        button.setTitleColor(.label, for: .normal)

        return button
    }()

    override func viewDidLoad() {
        super.viewDidLoad()

        view.addSubview(buttonContainerView)
        buttonContainerView.contentView.addSubview(button)
        buttonContainerView.snp.makeConstraints {
            $0.center.equalToSuperview()
        }

        button.snp.makeConstraints {
            $0.horizontalEdges.equalToSuperview().inset(12)
            $0.directionalVerticalEdges.equalToSuperview().inset(4)
        }
    }

    override func viewDidLayoutSubviews() {
        super.viewDidLayoutSubviews()

        buttonContainerView.layer.cornerRadius = buttonContainerView.bounds.height / 2
    }
}
站内所有文章版权归属LeftHeroAI导航站,无授权禁止任何主体转载、抄袭、复制内容,亦不得私自架设镜像站点。一经侵权,本站将通过法律途径追责。
相关文章





汇集全球数千款 AI 工具,每日持续更新,配套 AI 开发学习资源,轻松用 AI 提升工作效率。快捷键 Ctrl+D/⌘+D 一键收藏本站。